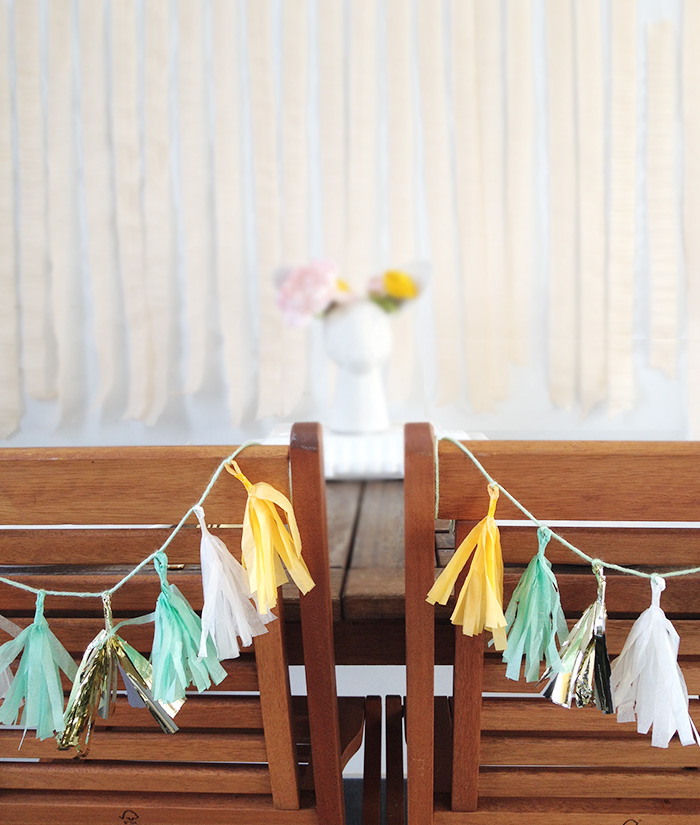
DIY Tassel Chair Garlands
We're excited to have Gloria from Little White Whale with us again today to bring you a fun DIY project! See how easy it is to create your own tassel chair garland, perfect for any celebration - from baby showers to weddings. 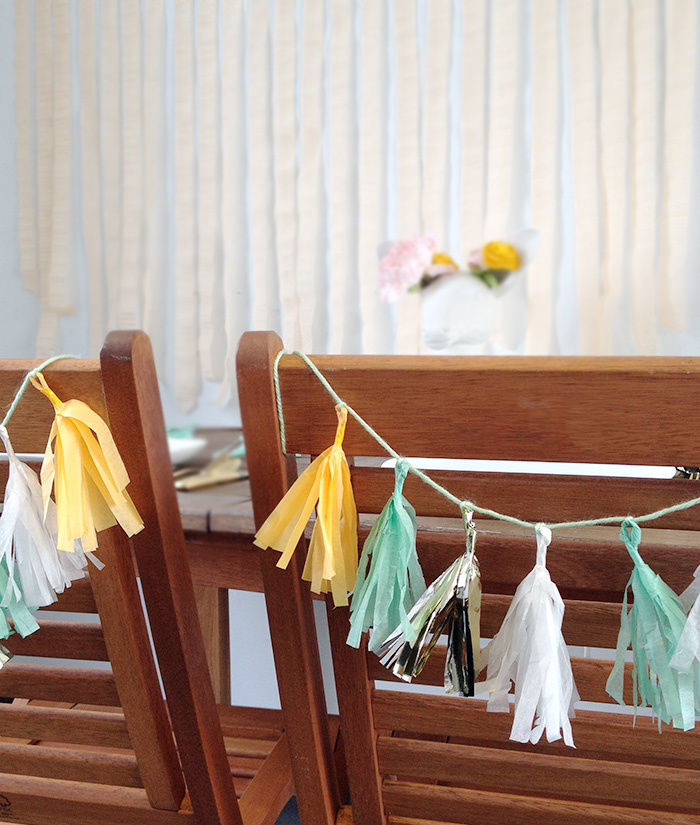
I started crafting around the time I was planning my wedding a few years ago, which resulted in a lot of DIY projects being incorporated into our special day. Although it was a ton of extra work at the time, I love being able to look back on the personal touches we added, from fabric flowers to a giant heart shaped photo booth backdrop. Here’s an easy project I would love to incorporate if I could go back and do it all over again – beautiful tassel chair garlands! They’re a really fun way to dress up your tables, so call up your friends and family and put them to work :-) Read on to learn how to make your own!
What you’ll need:
- paper tissue/mylar sheets in different colors
- scissors
- tape
- string or yarn
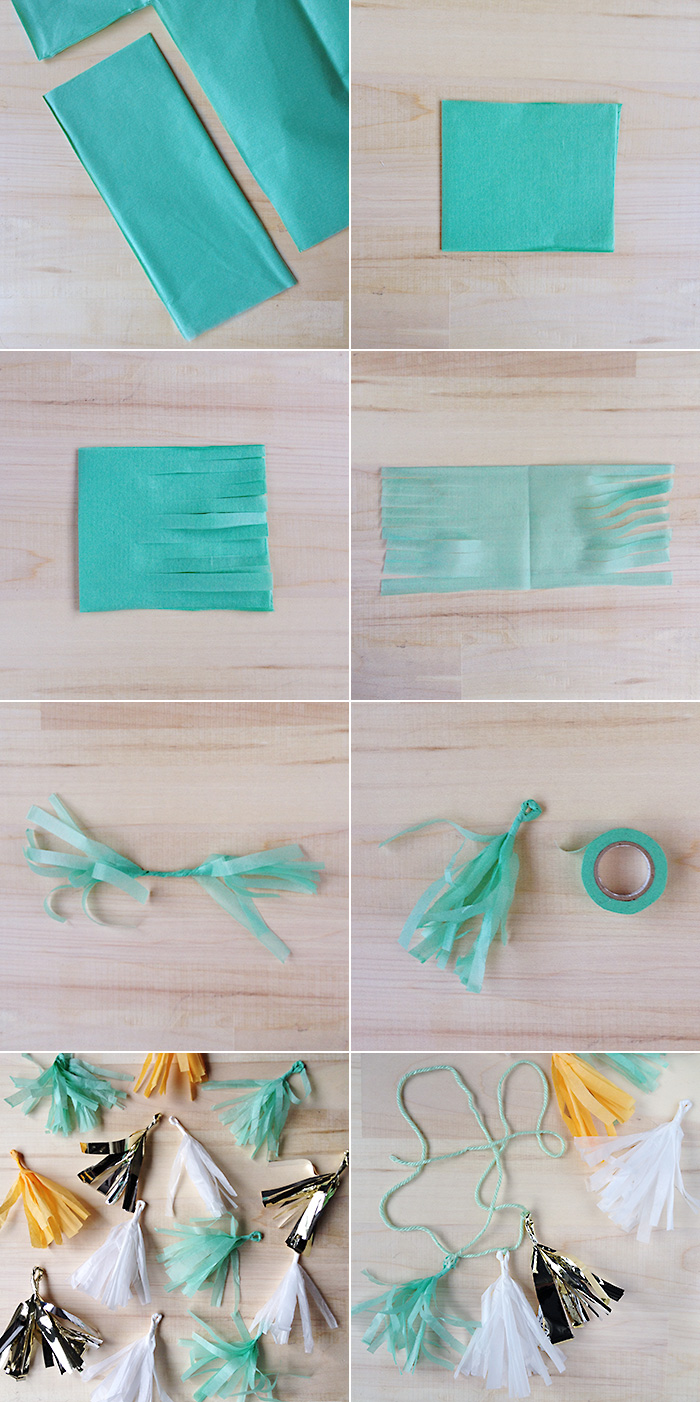
- Stack a few sheets of paper tissue, and cut out a 9.5″ x 4″ rectangle
- Fold the rectangle in half
- Cut thin strips towards the folded edge, about 2/3 of the way
- Unfold and separate the layers into single sheets
- Roll straight down the center to create a thin “rope”
- Bring the tasseled ends together and twist the top to create a loop. Secure with a bit of tape
- Repeat steps 1 through 6! You’ll need 8 tassels for each garland
- Determine how low you would like the garland to hang from the back of the chair, and cut a piece of string to size (the ones I used were 42″)
- Tie on the tassels starting from the middle and work outwards. Attach the finished garland to the chair, and you’re done!