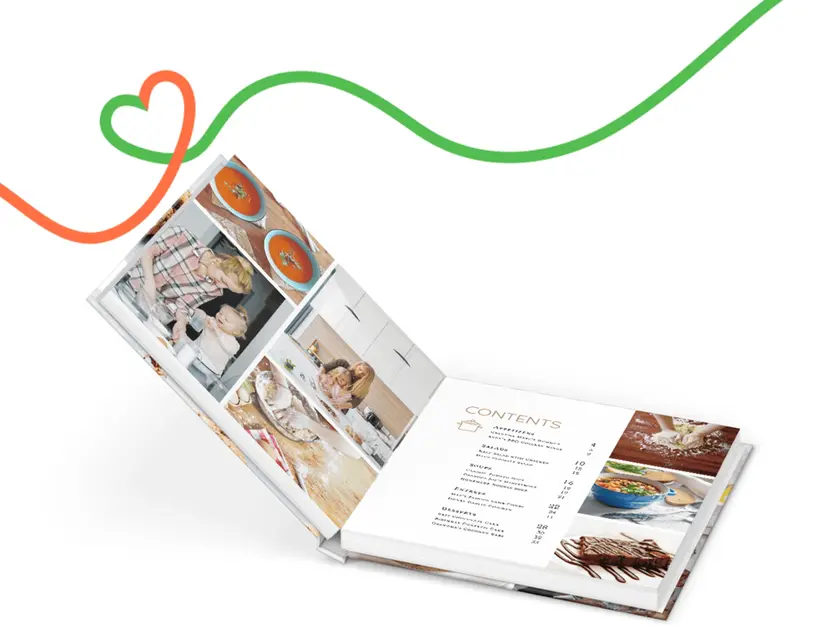
A custom table of contents is a great addition to many kinds of photo books. It’s not always essential, but can be useful for easier browsing of lengthier photo books, or any book with distinct pages or sections.
A table of contents also adds visual interest to the book, and can be really fun to design. Your photo book or scrapbook’s table of contents could be plain and simple or colorful and decorative, but it should be cohesive with the book’s overall aesthetic. Place it on the front page, or one of the first pages between a title or introductory page and the main content of a book.
A table of contents will generally reference page headers (or brief descriptions of the page’s content) as well as page numbers. Start by learning how to add page numbers to your Mixbook projects. Then, create and customize a table of contents using the tools in the Text panel and (optionally) Stickers panel in Mixbook Studio™.
Here are some basic instructions for creating a custom table of contents, plus ideas for different designs.
The basic table of contents
This simple table of contents style is the easiest to create. It can also be a good starting point for a more elaborate design. Here are the basic steps:
- Open the Text panel in Mixbook Studio™, click the Add Text button, and click on the page where you want the table of contents to appear.
- Click and drag the corners of the text box to resize it. Use the Smart Guides to center or otherwise neatly position the box. (You can always resize and move it later).
- Click in the box and type the title—e.g. “Table of Contents,” or “Contents.”
- Hit return, then type the first page/section’s header or brief description, followed by a series of periods, dashes, or empty spaces, followed by the corresponding page number. (Do not worry about the formatting at this stage.)
- Repeat Step 4 until you’ve typed all the text needed for your table of contents, with the correct descriptions and page numbers.
- Highlight the title text and use the tools in the Text panel to select a new font, size, alignment, and optional bold or italic style. Most titles are a larger size than the body text and centered, but you can format yours however you like.
- Highlight the main body text of the table and select your preferred size, font, alignment etc. options.
- Adjust the number of periods, dashes, or empty spaces between the description text and page number so that all the table items are neatly aligned.
- Optionally add a fill color and/or border to the text box using the tools in the Text panel.
Tip: Match the font choices used throughout the rest of your photo book for a cohesive look.
The colorful sticker table of contents
This style of table of contents elevates the basic one discussed above. Instead of periods, we have used rectangular-shaped stickers to connect each description to its respective page number.
The page numbers are housed in heart-shaped stickers, which we have copied and pasted to ensure that the shape sizes stay consistent. We also used different colors for each line of the table, creating a cheerful rainbow effect.
Tip: The Forward and Back buttons in the pop-up editor menu are key to correctly layering the text boxes and heart stickers above the rectangle stickers.
The photo shape table of contents
The above layout uses some of the photos from the book to indicate each section of content. We used the Edit>Shape tool in the pop-up editor menu to create circular photos, and then added colored borders to the shapes.
We arranged rectangular stickers, resized into thin lines, with text boxes for the page numbers and descriptions. The next edits were to add solid fill colors and white borders around the stickers and text boxes.
This table of contents design is visually interesting, and there are endless variations you could try.
The two-page spread table of contents
All our previous examples have used recommended backgrounds from the Backgrounds panel. But, don’t forget that using a photo as a background works really well too. In this case, we spread the panoramic photo across two pages to make an even more interesting table of contents design.
The table of contents is layered over the right-hand page in the spread. We made sure not to cover anything important in the photo. However, adjusting the opacity of the white text box kept the photo partially visible without affecting the legibility of the black text.
Design your own custom table of contents
With these basic instructions and a few easy ideas, you can jump into creating your own unique table of contents with confidence. Head to Mixbook and get started today!
Tip: No matter what kind of photo book you’re adding a table of contents to, you’ll find some great design inspiration in our collection of cookbook themes. Many of them include beautiful tables of contents created by our professional design team.
